
Pan-seared scallops with butter sauce is an elegant dinner that takes just 10 minutes to make. Tender and succulent, with a bit of indulgence. You’ll never order scallops at a restaurant again when you see how easy it is to cook them at home!
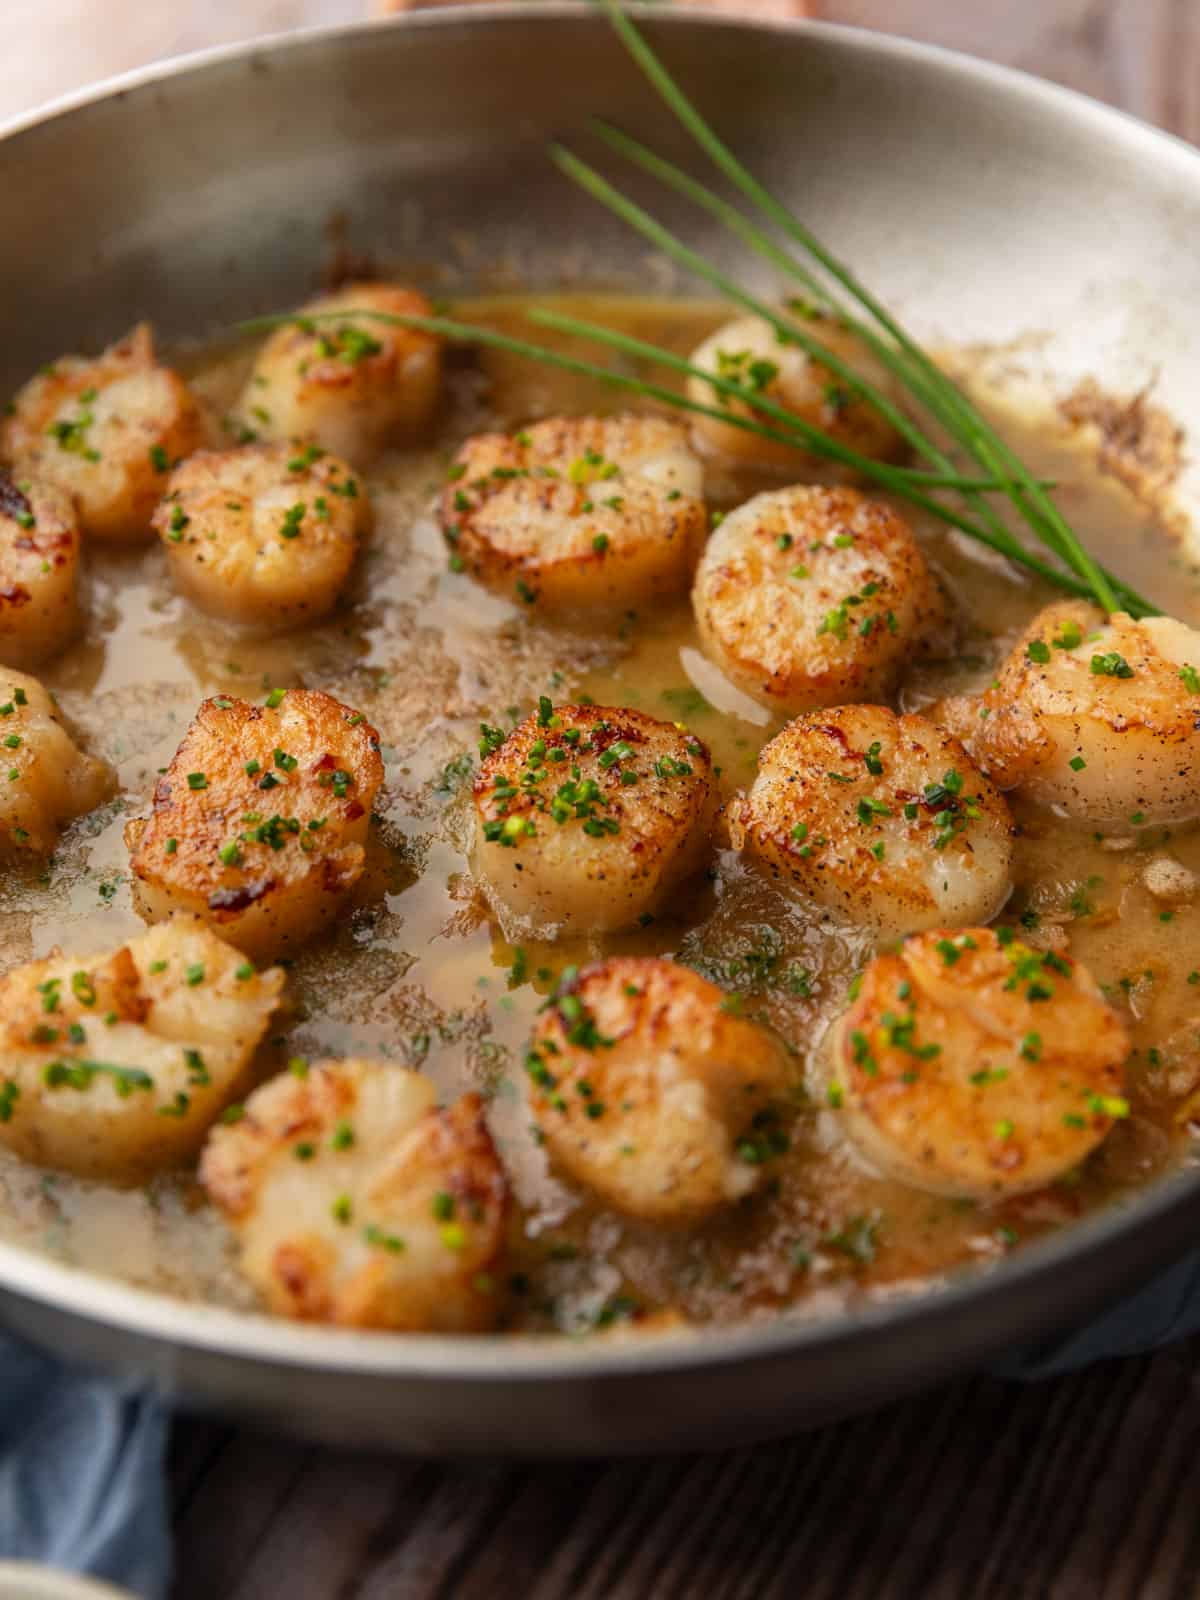
Sometimes life is so hectic, the best you can do is a date night-in. When your babysitter is booked for weeks or those Valentine’s Day reservations fall through, this recipe for pan-seared scallops will save the day.
It’s surprisingly quick and easy, but it has a high-end appeal that makes it worthy of special occasions.
And don’t worry—if scallops are something you always order at restaurants but never make at home, you can do this! They take only 10 minutes from start to finish (yes, that includes prep!) and the tips below will show you how to cook scallops perfectly every time.
In addition to those at home date nights, I love serving these pan-seared scallops for dinner parties and any other time I want to impress friends and family with an elegant dish—without spending hours in the kitchen.
Plate them atop creamy mushroom risotto, bucatini cacio e pepe, garlic butter pasta, or alongside crisp roasted brussels sprouts to make a complete meal.
Jump to:
🦪 Ingredient notes
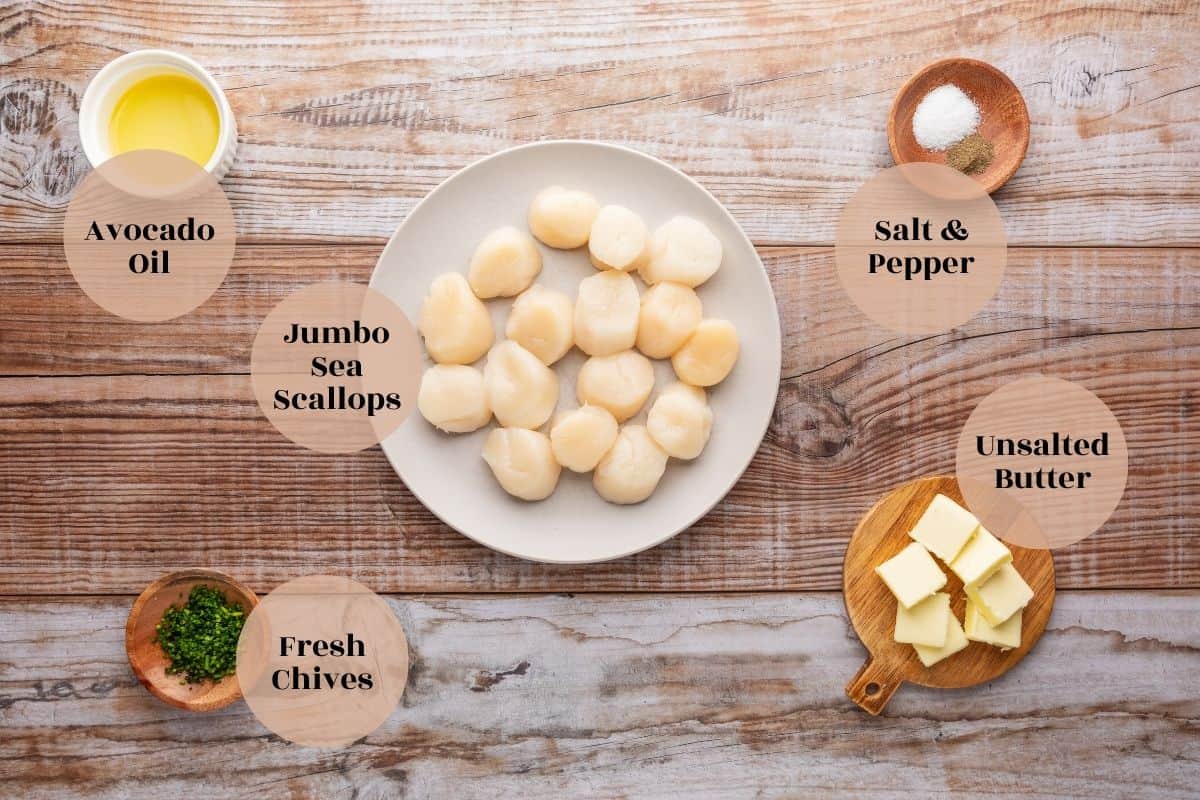
- Scallops - Dry sea scallops that are fresh are the best scallops for searing. See my tips below on buying and preparing scallops for cooking. Bay scallops can be used, for a less expensive option. They are much smaller and will quick much quicker.
- Oil - Use avocado oil or another high smoke point oil with a neutral flavor, such as canola or vegetable oil. An oil with a lower smoke point, like extra-virgin olive oil, will start smoking over high heat—this will probably set off your smoke detector (which is never fun!), and it also imparts a bitter flavor in your food. A high smoke point oil prevents burning and the neutral flavor means you’ll taste the seared scallops and butter sauce, not the oil you used in the pan.
- Chives – These are optional; they add a bit of color and a mild onion flavor to the seared scallops.
🦪 Different types of scallops
- Fresh Scallops vs. Frozen Scallops - Fresh scallops are generally superior in terms of taste and texture, but frozen can be a good alternative when fresh scallops aren’t available. Simply defrost frozen scallops and pat them dry before cooking.
- Wet Scallops vs. Dry Scallops - There are two types of scallops: wet and dry. Wet scallops are soaked in a water solution to extend their shelf life, which can affect their taste and texture. Dry scallops, which are the variety I recommend for this recipe, have no additives, which allows them to sear beautifully and maintain their sweet, delicate flavor.
- U Designation for Scallops - The U designation refers to the size of the scallop. U10, for example, means that there are under 10 scallops per pound; scallops with a higher number are larger and take longer to cook.
👩🏻🍳 How to prepare scallops for cooking
Before you start cooking scallops, rinse them under cold water to remove any grit and sand. After rinsing, pat them completely dry with a clean kitchen towel or paper towels. (If you use a kitchen towel, throw it in the wash afterwards.) This step will help the scallops achieve a perfect sear.
Next, turn your attention to the side of the scallop, where you'll see a small, tough crescent-shaped muscle known as the abductor muscle. This muscle is easy to identify, as it has a different texture and color compared to the rest of the scallop. To remove it, simply pinch it between your thumb and forefinger and pull it off.
Now your scallops are ready to cook!
📋 Substitutions and variations
- Dairy-Free – Use a dairy-free butter alternative.
- Garlic - Add freshly minced garlic for the last minute of cooking with the butter for a garlic butter sauce. Be careful to not cook the garlic too long or it will burn.
- Herbs – Feel free to substitute other soft fresh herbs you have on hand for the chives, or use a combination. Parsley, for example, pairs quite well with pan-seared scallops.
🔪 Step by step instructions
Preheat a large skillet over medium heat while you prepare the scallops. Pat the scallops dry and season both sides with sea salt and black pepper.
Add the oil to the pan, followed by the scallops, in a single layer. Allow them to sear for a minute or two on the first side—don’t move them.

Carefully flip the scallops and place the pieces of butter around them.
Let the scallops cook for 2-3 minutes more, or until they’re golden brown on the outside, opaque in the middle, and just firm to the touch around the edges.
Place scallops on a serving plate or platter and pour the butter sauce over them. Scatter the freshly chopped chives onto the scallops, then serve immediately.

If you ever don't recognize a tool or skill that is mentioned, be sure to look it up in our Glossary of Cooking Terms and Definitions for more information.
⭐ Expert tips
- Pat the scallops dry to remove excess moisture. If they’re still damp when you put them in the pan, you won’t get a nice sear. (You’re also likely to get some painful oil spatters on your hands!)
- The best way to ensure the scallops cook evenly and don’t stick to the pan, is to heat the pan before adding the oil. Let it warm up while you rinse and dry the scallops.
- For the best sear, I recommend using a stainless steel or cast iron skillet, which distributes heat more evenly, allowing you to achieve a perfect caramelized crust.
- Don’t overcrowd the pan or the scallops won’t brown on the bottoms. If they're packed too tightly, they'll steam instead, which means they’ll be less flavorful and the texture will be soggier.
- Another important tip for how to sear scallops is not to move them. If you get antsy and start trying to peek underneath them or flip them too soon, you'll end up with scallops that don't have that golden crust or, even worse, tear apart.
- Don’t overcook scallops. You want them to be opaque and just firm on edges. Remember, like other proteins, they will continue to cook a little bit after you remove them from the pan.
🥡 Storage suggestions
Keep leftovers in an airtight container for 3-4 days in the refrigerator. Reheat in the butter sauce over low heat on the stovetop.
🍤 More seafood recipes
If you loved this perfectly pan seared scallops recipe, check out these other seafood recipes that I know you will love too!
📖 Recipe

Pan Seared Scallops with Butter Sauce
Ingredients
- 1 pound fresh sea scallops approximately 16 total
- 1 teaspoon fine sea salt
- ¼ teaspoon black pepper freshly ground
- 2 Tablespoons avocado oil
- 4 Tablespoons unsalted butter cut into 4 pieces
- fresh chives chopped (optional garnish)
Instructions
- Preheat a large stainless steel or cast iron skillet over medium on the stovetop.
- While the pan is heating, rinse the scallops under cold running water to remove any leftover sand and remove the adductor muscle if present.
- Use a paper towel to pat the scallops as dry as possible, then season them on both sides with salt and pepper.
- Add the avocado oil to the heated pan and then add the scallops in a single layer, being careful not to overcrowd the pan.
- Let the scallops sear for 1-2 minutes, without moving them, until golden brown.
- Gently flip them over and then evenly distribute the pats of butter around the pan.
- Let the scallops cook for another 2-3 minutes until they golden brown on the outside, opaque in the middle, and just firm to the touch around the edges.
- Remove the scallops from the pan and place on a serving plate or platter.
- Pour the butter from the pan over top, sprinkle with the fresh chives and serve immediately.
Notes
- Scallops - Frozen scallops may be used, but must be completely defrosted and pat dry of any excess moisture. Use dry scallops as opposed to wet. Bay scallops may be used, but are smaller and cook much more quickly.
- Oil - A high smoke point, neutral flavored oil will ensure the best flavor without burning the scallops. Canola or vegetable oil are other alternatives.
- Dairy-Free - Use a dairy-free butter alternative.
- Leftovers - Keep in an airtight container in the refrigerator for 3-4 days. Reheat in a pan on the stovetop over low heat with extra butter.



Comments
No Comments