
 By
By 
I've been making homemade gravy for years, and it's one of those kitchen basics that I think every home cook should know. Once you learn the simple ratio, you'll never need a packet of gravy mix again.

This beef gravy recipe can be made with pan drippings, broth, or stock, making it perfect for everything from Sunday pot roast to weeknight meatloaf. I'll show you the same foolproof method I use every time, along with my best tips for making smooth, flavorful gravy from scratch.
Jump to:
- Why You'll Love This Beef Gravy Recipe
- Ingredients You'll Need
- Easy Ways to Customize Your Gravy
- Can You Make Beef Gravy Without Drippings?
- My Foolproof Gravy Ratio
- How to Make Beef Gravy
- Amanda's Kitchen Tip
- Serving Suggestions
- Tips for Smooth, Lump-Free Gravy
- Recipe FAQs
- Storage and Reheating
- More Homemade Favorites
- Recipe
- Comments
Why You'll Love This Beef Gravy Recipe
- No Waste - Put every bit of flavor to good use by making this gravy with pan drippings, juices, broth, or stock instead of letting them go to waste.
- Better Flavor - Homemade beef gravy has a fresher, more savory flavor than anything you'll get from a packet, and you can customize the seasonings to your taste.
- Simple Ingredients - You only need four basic ingredients, and you control exactly what goes into your gravy, including the amount of salt.
- Quick & Easy - This foolproof method comes together in about 15 minutes and is perfect for everything from holiday dinners to weeknight meals.
- Kitchen Skill - Once you learn this simple gravy method, you can use it to make beef, chicken, pork, or turkey gravy with confidence.
Ingredients You'll Need
You only need four simple ingredients to make homemade beef gravy, whether you're using pan drippings, beef broth, or stock.

- Fat - Fat is the foundation of any good gravy and the first part of making a roux, a simple mixture of fat and flour that thickens soups, sauces, and gravy. You can use beef drippings, butter, oil, or lard. I usually use unsalted butter along with the fat from the pan drippings for the best flavor.
- Flour - All-purpose flour combines with the fat to create the roux that thickens the gravy. Cooking the roux for a minute or two also removes the raw flour taste and adds a little extra depth of flavor.
- Liquid - Pan juices and drippings are my first choice because they add the most flavor, but beef stock or broth works just as well when you don't have drippings. Stock is made with bones, giving it a deeper flavor than broth, but either will make a delicious gravy.
- Seasonings - The amount of seasoning you need depends on the drippings or broth you're using. A low-sodium broth will need less seasoning. If your roast was well-seasoned, you may not need much more than a taste of salt and pepper. Always taste your gravy first before adjusting the seasonings.
Easy Ways to Customize Your Gravy
- Add a dash or two of Worcestershire sauce.
- Season the gravy with garlic powder or onion powder.
- Sauté fresh herbs like thyme or rosemary in the melted butter.
- Sauté fresh minced garlic or sauteed mushrooms with the butter.
- Add a splash of red wine to the broth.
Can You Make Beef Gravy Without Drippings?
Absolutely! While pan drippings create the most flavorful beef gravy, they're not required. This recipe also works beautifully with beef broth, beef stock, or a combination of drippings and broth. If you're making gravy for a roast, use the drippings whenever you can. For weeknight dinners like meatloaf or Salisbury steak, broth is an easy and delicious alternative.
My Foolproof Gravy Ratio
This is the simple gravy ratio I've been using for years, and it works every time. Whether you're making beef, chicken, pork, or turkey gravy, this method creates a smooth, flavorful gravy that's easy to adjust. If you prefer a thicker gravy, reduce the amount of liquid.
2 tablespoons butter + 2 tablespoons flour + 2 cups pan drippings, broth, or stock = about 2 cups gravy
How to Make Beef Gravy
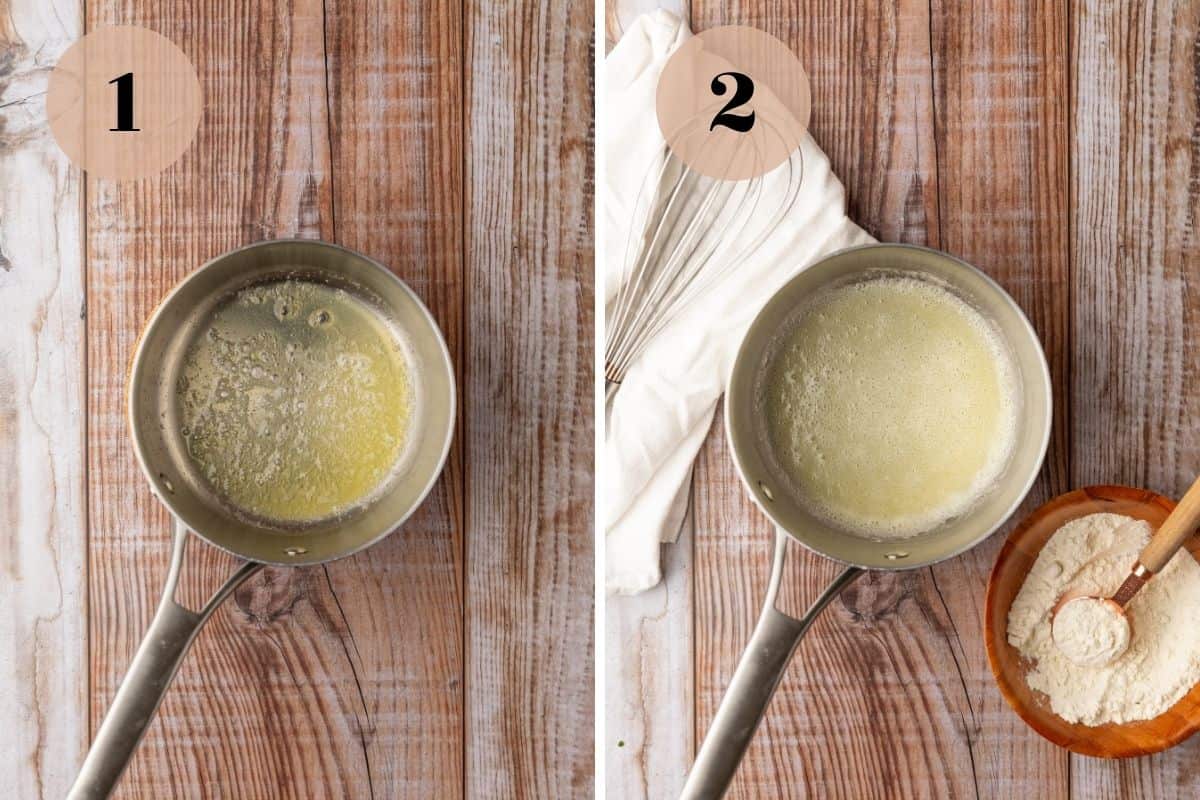
Step 1: Add the fat to a sauté pan over medium heat. If you're using butter, let it melt completely and stop foaming before adding the flour. This allows the water to evaporate, creating a smoother roux that blends more easily with the flour. If you're using pan drippings, they're ready to use as soon as they're heated through.
Step 2: Sprinkle the flour over the fat and whisk until smooth. Continue cooking the roux for 1 to 2 minutes, until it's lightly golden and no dry flour remains. For a deeper flavor, let it cook a little longer until it's a darker golden brown.
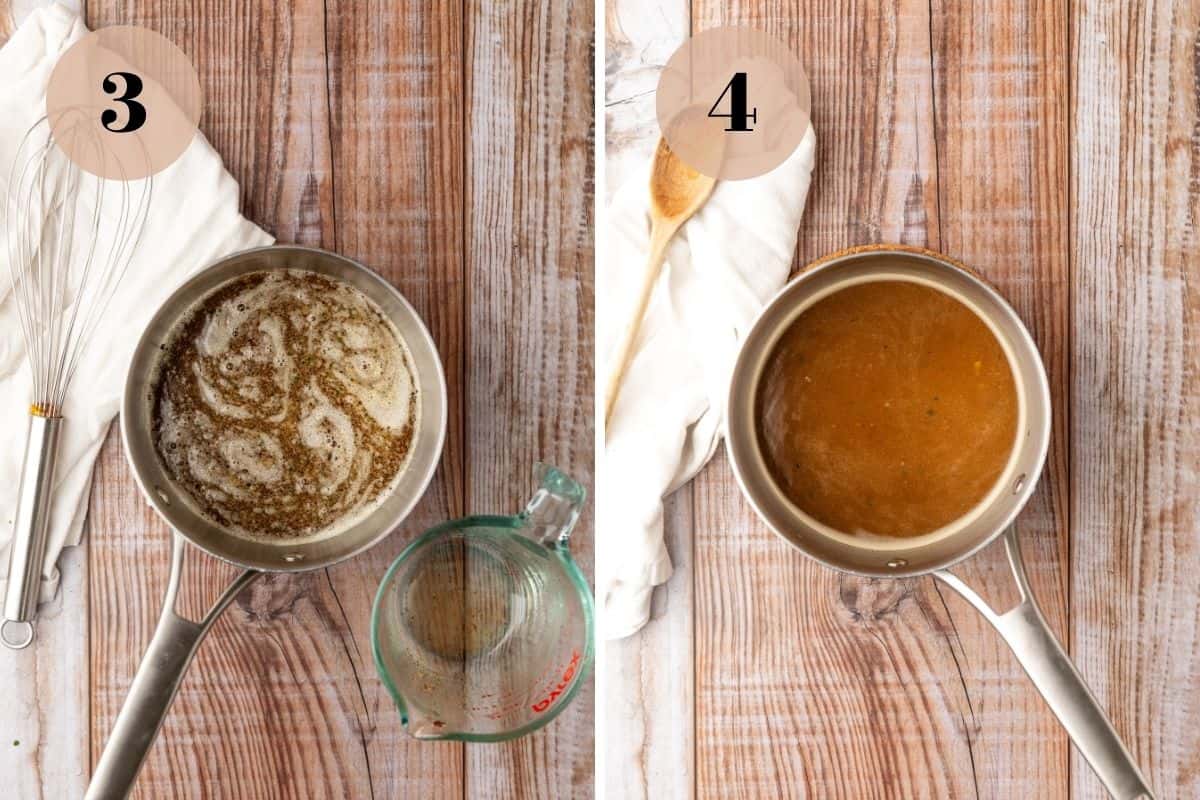
Step 3: Slowly whisk in the warm pan drippings, broth, or stock a little at a time until smooth. Using warm liquid helps prevent lumps and creates a silky gravy.
Step 4: Bring the gravy to a gentle simmer, whisking occasionally, until it reaches your desired consistency. If it's too thick, whisk in a little more broth or stock. If it's too thin, let it simmer a little longer to reduce, or whisk together 1 teaspoon of flour with a small amount of gravy until smooth, then stir it back into the pan.
Amanda's Kitchen Tip
After your meat has rested, strain the pan drippings into a measuring cup or bowl and let them sit for a few minutes. The fat will naturally rise to the top, making it easy to skim off if you prefer a lighter gravy, or use that fat as the base for your roux for even more flavor. For a quick trick, chill the back of a spoon in a bowl of ice water, then gently skim it across the surface to lift off the fat.
Serving Suggestions
This homemade beef gravy is delicious served over mashed potatoes, pot roast, roast beef, meatloaf, or Salisbury steak.
It's also a simple way to add extra flavor to egg noodles, rice, open-faced roast beef sandwiches, or even poutine.
If you have leftover gravy, stir it into soups, stews, or beef stroganoff for an extra boost of savory flavor.
Tips for Smooth, Lump-Free Gravy
- Use a whisk. A whisk breaks up the flour much better than a spoon, helping you create a smooth, lump-free gravy.
- Let the butter stop foaming. If you're using butter, wait until it has completely melted and stopped foaming before whisking in the flour. This creates a smoother roux that blends more easily.
- Add warm liquid slowly. Warm broth, stock, or pan drippings blend into the roux much more smoothly than cold liquid. Pour it in gradually while whisking to help prevent lumps.
- Don't panic if you get lumps. It happens to everyone! Pour the gravy through a fine-mesh sieve, or blend it for a few seconds with an immersion blender until smooth.
Recipe FAQs
How much gravy should I make per person?
Plan on about ⅓ to ½ cup of gravy per person. If you're serving a holiday meal or multiple side dishes, it's always a good idea to make a little extra.
Why isn't my gravy thickening?
Gravy thickens as it simmers, so give it a few minutes before making any adjustments. If it's still too thin, let it simmer a little longer or whisk together a small amount of flour with a little gravy before stirring it back into the pan.
Can I double this recipe?
Yes! This recipe doubles easily. Simply keep the same ratio of fat, flour, and liquid, and whisk continuously while adding the liquid to maintain a smooth gravy.
Storage and Reheating
- Refrigerator - Store leftover gravy in an airtight container in the refrigerator for up to 3 days.
- Freezer - Let the gravy cool completely, then freeze it in an airtight container, freezer bag, or individual portions in an ice cube tray for up to 6 months. Thaw overnight in the refrigerator before reheating.
- Reheating - Warm the gravy over low heat on the stovetop, whisking occasionally until smooth. If it has thickened in the refrigerator or freezer, whisk in a splash of beef broth or water until it reaches your desired consistency. You can also reheat it in the microwave, covered, to prevent splattering.
More Homemade Favorites
Recipe

Homemade Beef Gravy
Ingredients
- 2 Tablespoons unsalted butter, or fat from drippings
- 2 Tablespoons all-purpose flour
- 2 cups meat drippings, or beef stock
- salt and pepper, to taste
Instructions
- Heat the butter in a small saucepan over medium heat until it melts and stops foaming.
- Sprinkle the flour over the top and whisk and cook for 1-2 minutes until light brown.
- Slowly pour in the drippings, while whisking continuously, until they are completely incorporated.
- Lower the heat and simmer the gravy for 2-3 minutes until thickened. Taste the gravy for seasoning and adjust, if necessary.

Comments
No Comments